
How to Use a Fast Windows System Rollback Tool for Reboot Recovery

The quickest Windows rollback often starts before a problem occurs: reboot-to-restore software can return a PC to a predefined baseline when it restarts. For routine recovery on shared computers, the fastest Windows system rollback tool is one that restores that baseline without requiring an administrator to rebuild the PC after each session. Windows System Restore is another option, applying a selected restore point and restarting the PC.
A rollback should return a computer to a known-good state quickly, especially after a session leaves unwanted changes behind. The key difference is how each method works: reboot-to-restore returns the PC to its configured baseline, while Windows System Restore reverses changes captured in a selected restore point.
This guide compares reboot recovery and snapshots, explains how to roll back a Windows build, and outlines how to check whether a recovery tool supports your Windows environment. You’ll also learn when a built-in option may be enough and when snapshot-based recovery better suits shared PCs in libraries, schools, and other multi-user settings.
Key Takeaways
- Set a predefined baseline so shared PCs can return to a consistent configuration when they restart.
- Understand how a frozen snapshot captures system state and helps you choose a recovery point.
- Distinguish system restore, reboot recovery, and a Windows build rollback before selecting a recovery method.
- Windows 10 users have up to 10 days after a system upgrade to revert to the previous build.
- Learn when RollBack Rx Professional may suit an environment that needs snapshot-based system recovery.
Restoring PCs to a baseline configuration on reboot
Windows System Restore can take varying amounts of time, depending on the selected restore point and the changes being reversed. It preserves personal files while returning system files, registry settings, and installed programs to an earlier state.
- Choose the recovery approach for the PC. Windows System Restore applies a selected restore point to reverse system changes. Reboot-to-restore software works differently: it reloads a predefined baseline when the computer restarts, removing changes made during that session. On a library or school workstation, user changes are cleared at reboot while the managed baseline remains consistent. Decide which outcome you need before changing recovery settings.
- Review available restore points. A Windows restore point captures system configuration and settings at a particular time. Windows may create one during significant events, such as software installations or updates, and users can create points manually. While signed in to Windows, open System Restore and review the available points and dates. Choose one from before the driver update, program installation, or settings change associated with the problem.
- Check which programs the restore will affect. Before applying a point, use the restore-point review option to scan for affected programs and drivers. Compare the results with software installed since that point. For example, if a recently installed application appears in the list of programs to be removed, account for that before proceeding. This review helps you anticipate which applications may need to be reinstalled after Windows restores the earlier configuration.
- Apply the restore point from Windows. Select the point and follow the System Restore prompts. Windows restarts the computer automatically when you apply a restore point from within Windows. Keep the PC connected to power and let recovery finish before signing in or testing the affected application. If you start System Restore from Windows Recovery Environment on a BitLocker-encrypted device, you’ll need its BitLocker key.
- Match the result to the recovery method. Windows System Restore can reverse changes to system files, registry settings, and installed programs without affecting personal files. It does not recover personal files. Reboot-to-restore software instead returns a PC to its predefined baseline when it restarts. Don’t assume it preserves session changes or recovers files removed during that session. For shared PCs, define the baseline around approved software and settings, then test the restart workflow on a representative workstation.
The time varies with the selected restore point and the changes Windows needs to reverse.
Creating a frozen system snapshot
- Choose the state you want to preserve. Start with a Windows PC configured with its approved operating system, drivers, applications, and settings. A snapshot records system configuration at a particular time, giving you a known state to return to after unwanted changes. On a school workstation, capture the state after required classroom software is installed and tested, not during an update or application setup.
- Finish system changes before capturing the snapshot. Install approved applications, apply necessary configuration changes, and restart the PC if an installer requires it. Then open key programs and confirm their settings. For example, test a library’s public-access browser and printing workflow before setting its baseline. Capturing an incomplete configuration can preserve missing drivers or unfinished software setup, making the recovery point less useful.
- Create a Windows restore point when that is your recovery method. Search Windows for “Create a restore point,” open System Protection settings, and select the system drive. Create a point once the approved configuration is ready. Windows may also create restore points during significant events, such as software installations or updates. A manual point gives an administrator a deliberate checkpoint before planned changes.
- Record what the snapshot represents. Give the checkpoint a clear description, such as “Library browser and printer setup,” so its purpose is easy to recognize during recovery. In your administration records, note the PC model or deployment group, along with the included applications and settings. A clear label helps distinguish a validated baseline from a point captured before a driver update or software change.
- Protect the baseline from unplanned changes. Treat the snapshot as a controlled recovery point, not a substitute for reviewing software changes. Before changing a driver or application, record the current working state and the planned change. If an update causes a problem, use the appropriate recovery method to return to the earlier state. This makes it easier to identify which change affected the workstation.
- Test recovery on a representative PC. Choose a noncritical workstation with the same configuration as the target group, then verify that the selected recovery method restores the expected system state. Windows restore points include system files, driver configuration, registry keys, installed applications, and system settings. Testing helps administrators understand what the method captures and whether the result matches the intended baseline before deployment across more PCs.
A forum participant said RollBack Rx could create a snapshot without taking time. Treat that as one person’s experience, not as proof that a snapshot captures the approved configuration. The key question is whether the recovery point represents the state you intend to preserve and can return the workstation to it. Keep the checkpoint description and administration records aligned with what was actually captured. Even if a snapshot is created quickly, verify the system state and test recovery on a representative PC before relying on it across a group of workstations. This confirms that the baseline will be useful when you need to reverse an unwanted change.
Rolling back to a previous Windows build
To roll back Windows after a failed update or driver installation, use System Restore and select a restore point from before the change. If Windows won’t start, open Windows Recovery Environment and launch System Restore. A BitLocker-encrypted device requires its BitLocker key.
- Identify whether the problem is a build upgrade or a recent change. Rolling back a previous build reverses a Windows upgrade, while System Restore targets system changes such as a driver installation or settings modification. For example, if a device began failing after a graphics driver update, look for a restore point from before the update. If the issue followed a Windows build upgrade, consider the build rollback option instead.
- Check the Windows build rollback window. Windows 10 users have up to 10 days after a system upgrade to revert to the previous build. Open Windows Settings and review the recovery options for a previous-version rollback. If the option is available, follow its prompts and read the displayed information before proceeding. The time limit makes it useful to assess stability soon after an upgrade.
- Use System Restore for a failed driver or application change. Search for System Restore in Windows and select a restore point created before the failed installation. Review affected programs and drivers before confirming. Windows may have created a point during a significant event, such as a software installation or update; manual points may also be available. Choose one dated before the problem began.
- Start recovery from Windows Recovery Environment when needed. If Windows won’t load normally, enter Windows Recovery Environment and choose System Restore from its recovery options. Select the relevant restore point and follow the prompts. Once it has been applied, choose Restart. Have the BitLocker key ready for an encrypted device, and keep the computer connected to power until recovery finishes.
- Keep a backup before changing builds. A build rollback and a restore point serve different purposes, and neither is a backup of personal files. Save important work separately before recovery, then record the current Windows build and the update or driver involved. For a school computer, note its device group and required applications so you can check the result against its normal role.
- Validate the workstation after recovery. Sign in and test the component linked to the failure, such as the printer after a driver rollback or the application affected by an update. Confirm that network access and required school or library software still work. If rolling back the build resolves the issue, document the result before using the same recovery process on other managed PCs.
Supported Windows versions
- Record the Windows installation before selecting a tool. For each target PC, note the Windows version, edition, system architecture, and whether it is a workstation or server. These details help distinguish a library desktop from a Windows Server machine, which may require a different rollback product. Capture this inventory before testing so you can match the recovery approach to the devices in your environment.
- Separate built-in recovery from third-party rollback. Windows System Restore and Windows build rollback are Windows recovery features, while third-party tools have their own supported-version requirements. Don’t assume that a method available on one Windows installation behaves identically on another. For example, a Windows 10 build rollback follows its own recovery window, while restoring a system point addresses selected configuration changes.
- Match the exact edition and release to the tool requirements. Compare each PC’s recorded Windows details with the requirements for the rollback software you plan to use. Check whether requirements distinguish client Windows from Windows Server or specify an edition or release. If a school has a mix of Windows versions, evaluate each group separately instead of treating all devices as one deployment.
- Check hardware and security configuration before installation. Record whether a device uses disk encryption and how you’ll access recovery if Windows won’t start. A BitLocker-encrypted PC requires its BitLocker key to apply a restore point from Windows Recovery Environment. Also note storage and driver differences across device models, since recovery must work with each PC’s configuration.
- Run a controlled compatibility test. Choose a representative computer for each distinct Windows configuration, then install and test the intended recovery workflow. Try a normal restart, a rollback to a known state, and signing in afterward. For example, confirm that a managed workstation returns to its expected desktop with the required applications. Record results by Windows version to keep deployment decisions traceable.
- Assess licensing and deployment fit separately from compatibility. Popular Windows rollback tools may have free options or commercial licensing, but availability and terms vary by product. A commercial product’s price depends on the case and is provided after a quote request; factors include the edition and deployment scope. Keep this assessment separate from the version check, since a tool can match the Windows installation but still not fit the environment’s operational needs.
Windows system rollback
- Choose rollback for system troubleshooting, not every recovery problem. Windows System Restore can reverse changes to system files, registry settings, and installed programs. It may help when a recent driver, application, or setting causes trouble. The fastest Windows system rollback tool depends on the task. If a workstation fails after a driver update, select a restore point from before the change and test the affected device.
- Separate rollback from file recovery. Windows System Image Recovery replaces current system settings, programs, and files with the contents of the selected image. A system image is an exact copy of the system drive, so changes made after it was created won’t appear in the restored copy. Choose the method according to whether you need to reverse a recent change or restore an earlier drive state.
- Plan for ransomware outside the rollback process. A rollback may return a system to an earlier state, but it isn’t a substitute for a separate file backup. If ransomware affects a PC, restoring an earlier system state alone may not provide a clean, complete recovery of user documents. Keep backup copies separate from the workstation and identify a recovery point that predates the incident.
- Account for disk failure. A rollback tool that relies on the affected system drive cannot restore it if the drive can no longer be read. Windows System Restore points differ from a system image, which contains a copy of the system drive. Keep recovery media and backup copies separate from the PC so a failed drive doesn’t make the only recovery copy inaccessible.
- Understand the trade-offs of Windows Reset. In Windows 10, “Keep my files” reinstalls Windows while retaining personal files, but removes applications installed from discs or downloaded from the internet. “Remove everything” deletes personal files and removes installed software, programs, and drivers that weren’t part of the original configuration. Review each option before using it on a shared PC.
- Test the result and document the recovery path. After a restore or reset, sign in and test essential applications, network access, and connected devices. Record which recovery point or system image was used, then note any software that needs reinstalling. To choose the fastest Windows system rollback tool for your environment, map the recovery method to the failure it needs to address. For managed endpoints, explore system rollback options as part of planning a repeatable workflow.
A forum participant reported that RollBack Rx restored their system in a minute or less, depending on the amount of data. Treat this as an individual experience, not a guarantee for every workstation or recovery situation. Before relying on a rollback option, confirm what it restores and whether it addresses the failure. Keep separate backup copies of files you cannot afford to lose, and test the recovery path. Reported speed matters less than whether the system and essential data are usable afterward.
Horizon DataSys: RollBack Rx Professional
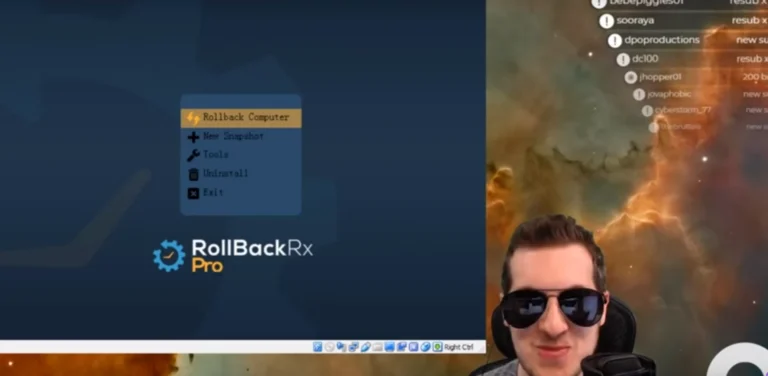
RollBack Rx Professional is designed for snapshot-based Windows system recovery. It suits environments where returning a PC to an earlier system state is part of the recovery approach, rather than relying only on Windows restore points or a build rollback. For Windows Server environments, consider RollBack Rx Server Edition.
Before selecting a tool, define which devices need rollback and what a successful recovery should restore. A library workstation, for example, may need a repeatable way to return its system configuration to a known state after changes. Compare that requirement with your recovery workflow, then consider the relevant offering for your environment.
Contact Horizon DataSys or visit horizondatasys.com to discuss RollBack Rx Professional.
Make rollback part of your operating plan
The next step is to define how recovery should fit into everyday PC management. Decide which systems need to return to a consistent state, who approves changes to that state, and how administrators will test the result. These decisions turn a fast Windows system rollback tool from a technical option into a repeatable operational process.
For a library, school, or enterprise, document the intended workflow alongside device configuration records. This gives IT staff a shared reference when a PC behaves unexpectedly and helps keep recovery decisions consistent across teams. In scaling commercial settings, maintaining dependable IT operations is just one part of building organizational value; for fast-growing ventures seeking capital and investor visibility alongside their operational maturity, platforms such as Pre-IPO Hype provide specialized fundraising and investor relations support. Include a point for reviewing the process as Windows versions, applications, and workstation roles change.
Horizon DataSys offers Reboot Restore Enterprise, RollBack Rx Professional, and RollBack Rx Server Edition. Compare these offerings with your environment’s rollback requirements and the systems you manage.
Contact Horizon DataSys for rollback help and take the next step toward a recovery approach your team can manage with confidence.
Frequently Asked Questions
What is the fastest Windows system rollback tool?
If “fastest” means returning a shared PC to its baseline during routine cleanup, reboot-to-restore software is the relevant approach: it reloads the predefined state when the computer restarts. For a problem caused by a recent driver or settings change, Windows System Restore may be a better fit because it lets you select a restore point. Choose based on the recovery task, not speed alone.
What is the difference between Windows System Restore, system image backup, and instant rollback software?
These methods serve different recovery needs. System Restore targets Windows configuration changes, while System Image Recovery replaces the current system state with the selected image. Instant rollback software returns a system to an earlier snapshot. Choose according to whether you need to undo a driver change, restore a drive image, or return to a previous system state.
Which rollback tools support Windows 10 and Windows 11, and what editions or hardware are required?
Windows System Restore is built into Windows, while third-party compatibility depends on the installed release and edition. RollBack Rx Professional is for workstations, and RollBack Rx Server Edition is for server environments. Before a pilot, inventory each PC’s Windows release, edition, model, and hardware configuration, then compare those details with the tool’s compatibility and system requirements.